Showing posts with label cmd. Show all posts

Tuesday, May 24, 2022

CMD


1. Prompt Command

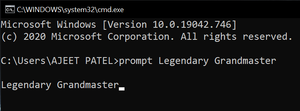
Usually, when we open our command prompt, we see in the left corner path of the current directory is written. So now we want to change it to our wish. Here Prompt command is used.

Syntax:

prompt name_that_you_want
2. Title Command

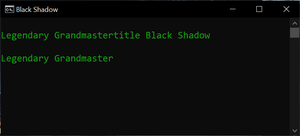
Similarly, like prompt, when we open command prompt, the title of the application is like “C:\WINDOWS\system32\cmd.exe” is written. If we want to change it, then we use the title command.

Syntax: 

title name_that_you_want
3. Color Command

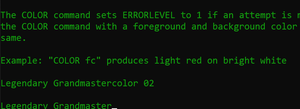
When we see hackers in movies, having some green codes moving very fast on their computer screen, we get fascinated. Maybe you’ve got bored while working on a black and white screen. Then you can use the color command.

It requires two Hexadecimal digits. First for background and second for the foreground. 

Example: color 02 makes it green text and black background. 
4. Opening CMD Shortcut

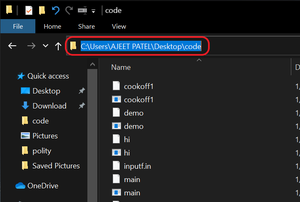
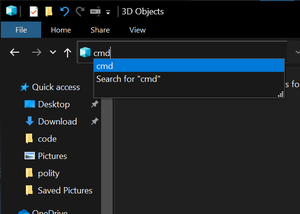
There are many ways to open command prompt in windows. One we’re going to discuss today is, to open CMD in any folder. Yes, we’ll open it in any folder. Simply go to the address bar of that folder type “cmd” and hit “enter”.
5.  Hide Folders  

When we hide any folder going from its properties, it gets showed as we check “Show hidden files” and the same thing happens when we use “attrib +h filename”. So now we are going to see a command that will hide your folder and there’s no any way to find it out again by others instead of you.  
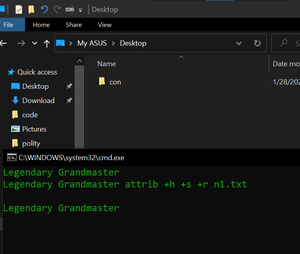
Syntax: 

attrib +h +s +r filename
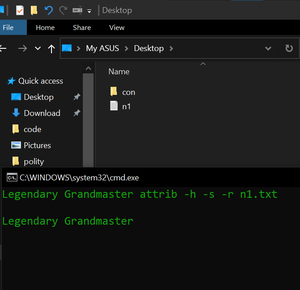
Note: Use “attrib -h -s -r file name ” to unhide the file.

6. Check your laptop’s battery health

So, the first command is for checking the battery health of the laptop. The command prompt will give you brief information and technical details about your laptop’s battery. To view a battery report, open a command prompt as an administrator and run the following command:

powercfg /batteryreport /output “C:\battery_report.html”

After hitting the enter key, your laptop’s battery report will be saved in your specified route in html format. (here we have given the path of the C drive).
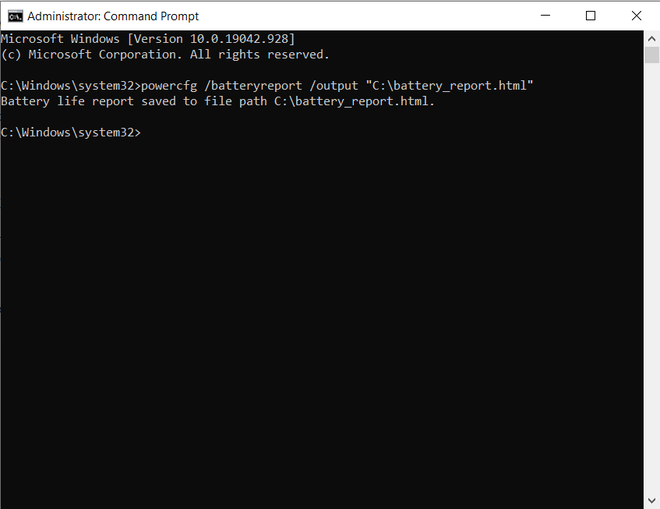
laptop's battery report

Battery report generated

Check out this detailed article checking laptop’s battery health.

7. Scan for system problems

With Windows command prompt, you can check all system files for any system problems like file corruption within a single command. Just open a command prompt in administrative mode and type:

sfc /scannow

This command will scan all protected system files, and replace corrupted files with a cached copy that is located in a compressed folder at %WinDir%\System32\dllcache. This process will take some time, so don’t close command prompt until verification gets completed.
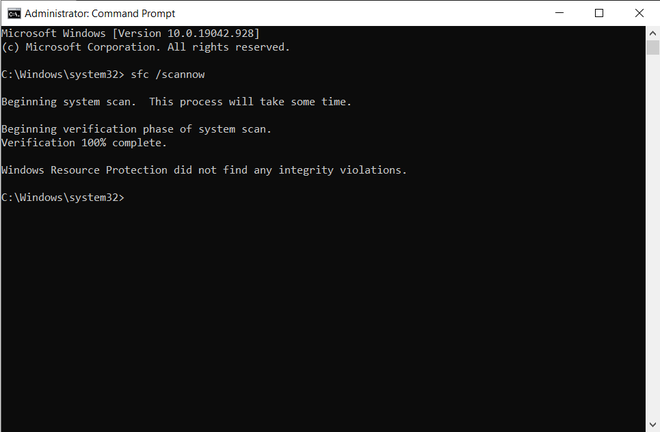
Scan for system problems

Scan for system problems

8. View your Windows license key

Sometimes you need to transfer your Windows 10 license to a new computer. At that time, your Windows product license key is very important. Let’s see how you can get your windows license key using a command prompt. As earlier, open a command prompt in administrative mode and after typing the command mentioned below, press the enter key.

wmic path softwarelicensingservice get OA3xOriginalProductKey
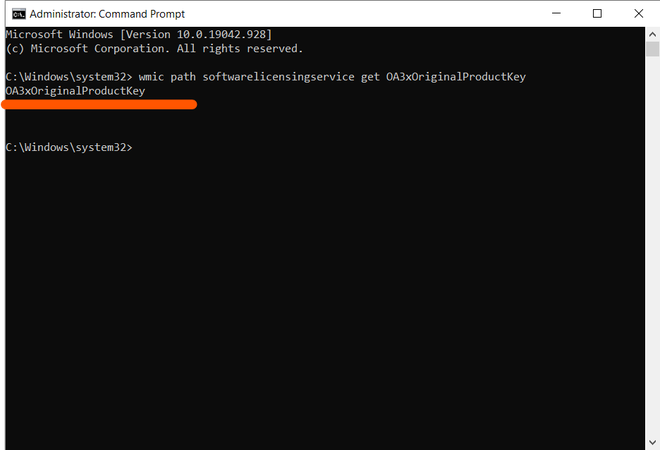
Windows license key

Windows license key

9. Save folder trees to disk

Sometimes you can’t find an overview of all the nested folders on a drive and get confused about the location of a particular folder. In this situation, the command line helps you out. It will give you a tree-like representation of all the nested folders in that directory. Type this command and after pressing enter you’ll see the pictorial representation of all the folders.

tree
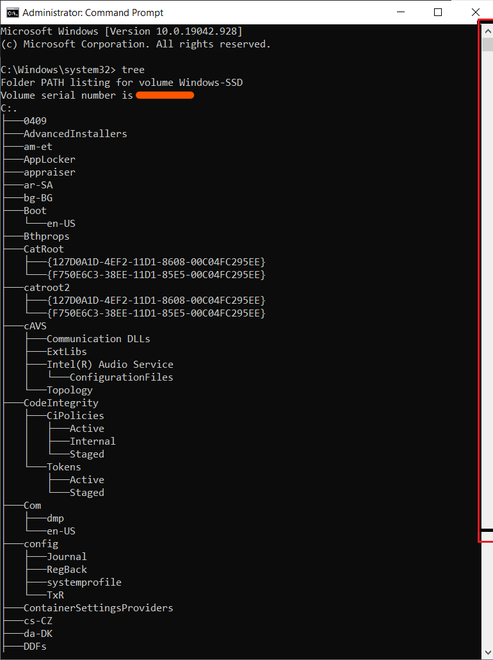
Overview of all the nested folders on a drive

Overview of all the nested folders on a drive

You can also add “> c:\export.txt” after tree, to save the results in a text file that you can browse in your local storage.
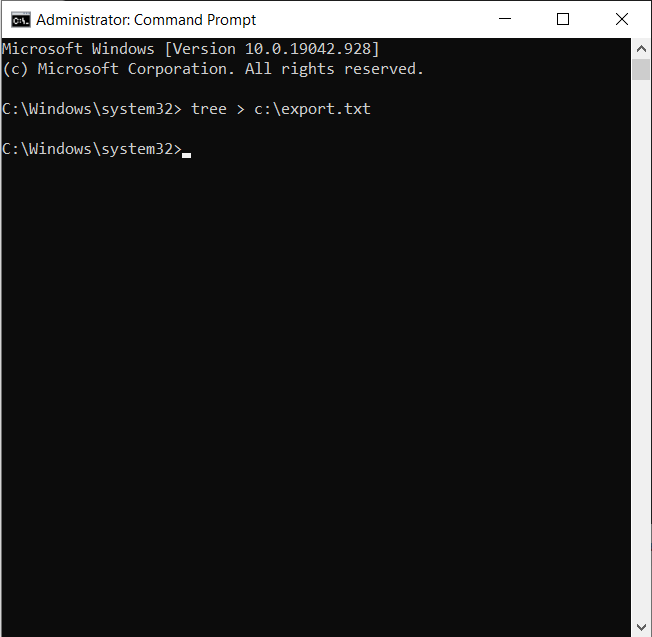
All the folders list is saved to the C drive.

All the folders list is saved to the C drive.

10. View and delete Incognito history

You might know that your computer has a Domain Name System (DNS) which converts the site URL that you type in the browser address bar into an IP address equivalent to that site. So your Incognito history also gets saved in a DNS cache, sometimes referred to as a DNS resolver cache.

  • To view DNS cache type ipconfig /displaydns in the command line, and press enter and you will see all the sites with their IP addresses.
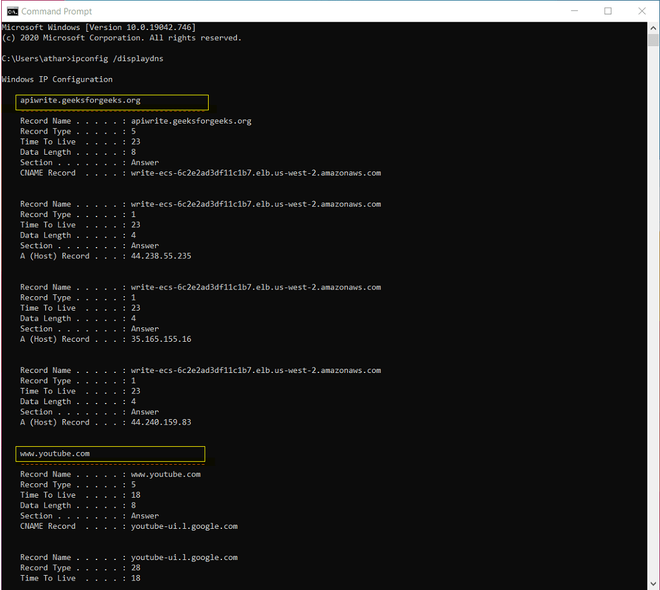
DNS Cache consisting list of websites and their IP Addresses

DNS Cache consisting list of websites and their IP Addresses

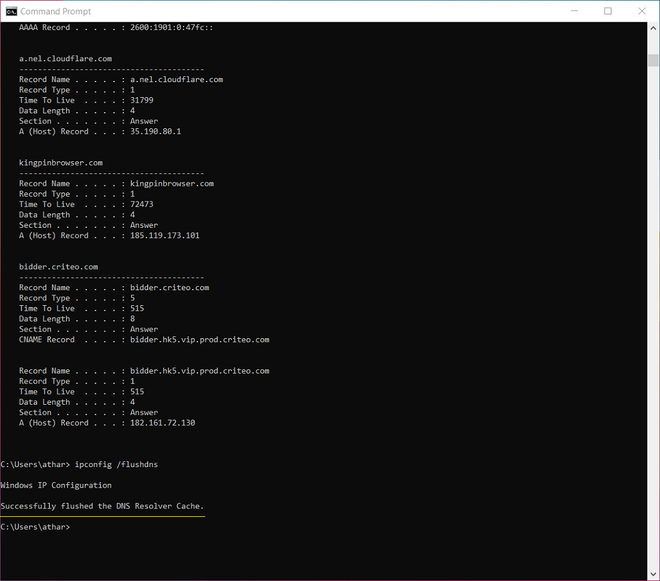
  • To delete DNS cache type ipconfig /flushdns and  your incognito history will be cleared.
DNS Cache cleared

DNS Cache cleared

How to Find the Wi-Fi Password Using CMD in Windows?

 WLAN AutoConfig service ( WLANSVC ) helps Windows 8 and Windows 7 computers to discover a wireless network (802.11 standards) and connect to it. The same service is used in  Vista instead of Wireless Zero Configuration(WZC) in Windows XP. In my personal experience by starting WLAN AutoConfig service instead of vendor wireless utilities on a computer, we can fix most of the wireless connectivity issues. Windows 8,  7 and Vista computers use WLANSVC service to manage wireless networks and you can find it on services window under the display name WLAN Autoconfig. Sometimes WLAN AutoConfig does not start automatically by some strange reasons. So we may need to go to the service page and start this service manually. This tutorial tells how to run it on a computer in different ways.


How to Start WLAN AutoConfig From Services
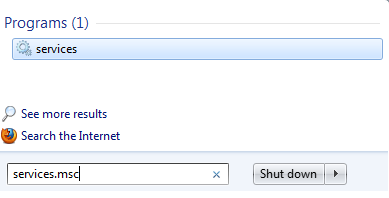
  1. Type services.msc on Search

  2. Click Services when shows in Search
    How to search for Wlansvc Service in Windows 8

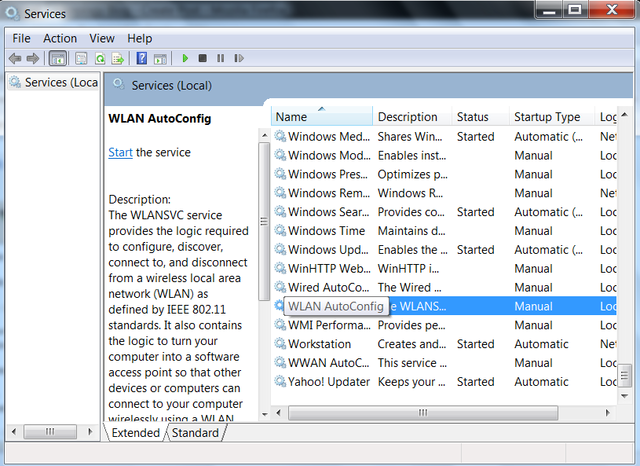
  3. Right-Click on the WLAN AutoConfig from the list of services listed. You may check the bottom of the list for it
    WLANSVC problems

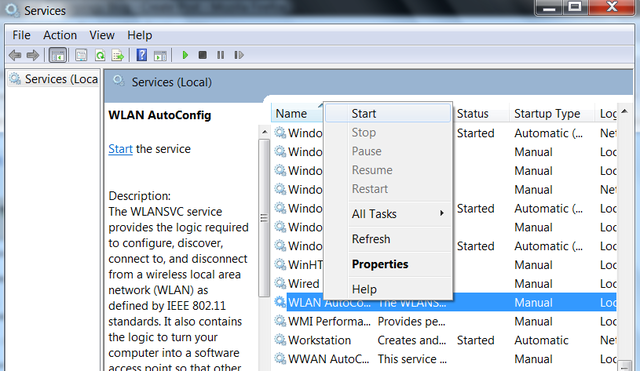
  4. Click Start to run WLAN AutoConfig(WLANSVC Service)
    help tutorial
Once you start WLAN AutoConfig(WLANSVC Service) on your computer, it will start to discover available WiFi networks in your area.


How to Start WLAN AutoConfig Service From Command Prompt

You have learned how to run wlansvc service from services window. There is one more method to do it apart from the GUI method. There is a DOS command to activate this service. However, we must have the administrative right to run this command because the DOS prompt must be run as administrator. Here we try the command prompt method to run it on Windows computer (Vista and above) for a particular wireless interface.
  1. Start Command Prompt as Administrator

    To start the command prompt as administrator, visit the link below and follow the instructions there.
    How to Run Command Prompt as Administrator

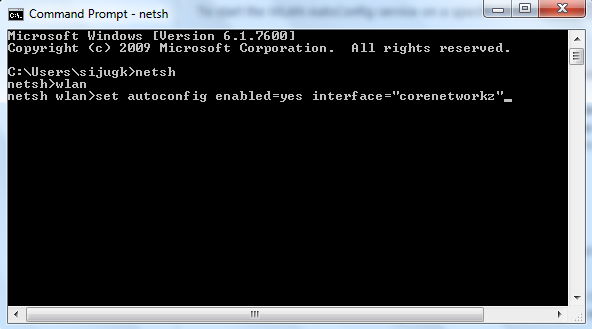
  2. Type netsh and press enter

  3. Type wlan and press enter

  4. Start Wlansvc for a Wireless interface

    This is the DOS Prompt command to start Wireless service on your Windows 8, 7 and Vista computer.

    set autoconfig enabled=yes interface="Name of Wireless Network Connection"

    You must specify the name of the wireless connection as the interface. Here on the image, I typed the name of WiFi network corenetworkz.
    DOS Command to open WLANSVC

  5. Press enter after entering the command prompt command to start WLAN AutoConfig on your computer to finish the process

To read more about the use of command prompt command to activate WLAN AutoConfig, visit the link below. Here you will see how to remove or modify wireless filters on Windows 8 and 7 using DOS Prompt commands.
How to Remove / Delete a WiFi Filter From Command Prompt

It happens sometimes that we forget our Wi-Fi password and it is painful to reset our Wi-Fi password as all our home devices and system are connected with the same network and we have to save the new password again to all our devices.

But we can save ourself from resetting Wi-Fi password if we ever connected our Windows 10 PC to that Wi-Fi network. Windows keeps a record of all our networks and their password so we don’t have to type the password again to connect to the same network. 

We can recover our forgotten Wi-Fi password by running a couple of quick ‘netsh’ commands using Windows Command Prompt.

Finding Wi-Fi Password

Step1: Press start and type CMD, right-click on the Command Prompt option shown as a search result and click on Run as administrator.  

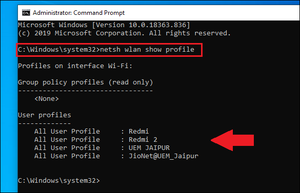
Step 2: Type netsh wlan show profile in the command prompt and press Enter to show a list of network names that we connect to. Note down the full name of the Wi-Fi network you want to find the password for. Here, the wifi name is Redmi. 

Find the Wi-Fi Password Using CMD in Windows 1

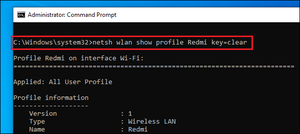
Step 3: Type netsh wlan show profile Wi-Fi name key=clear, substituting ‘Wi-Fi name’ for the network name we just made a note of (for example, netsh wlan show profile Redmi key=clear) then Press Enter. 

Find the Wi-Fi Password Using CMD in Windows 2

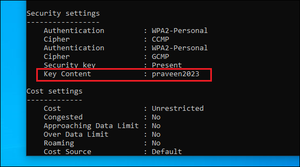
Step 4: Scroll through the results until we find an entry named Key Content -our Wi-Fi password will be listed next to it.  

Find the Wi-Fi Password Using CMD in Windows 3

As now we got our Wi-Fi password, you can connect our device to the network to complete our work.